SpringMVC让你的C层更加高效
springMVC(下集)
- SpringMVC 的常用注解
- SpringMVC 静态资源的处理
- SpringMVC 的文件上传和下载
- SpringMVC 的统一异常处理
- SpringMVC 的拦截器
- SpringMVC 的自动校验
springmvc常用注解
使用cookie获取页面设置的cookie值,代码示例:
- 构建页面进行cookie的值的设置
1 | <head> |
- 后台业务代码
1 | @Controller |
- 操作访问,先访问jsp页面进行cookie值的设置。在进行请求的访问
使用@SessionAttributes将数据放入session作用域中
需要注意的是@SessionAttributes只能用在类上
常用的设置@SessionAttributes(value={“user1”, “user2”}) 会将model中属性名为user1和user2的属性添加到会话中
1 | @SessionAttributes(value={"user"}) |
访问连接,分别在不用的页面进行取值
使用@ModelAttribute
- 注释在一个普通方法(初始化数据)
1 | //构建一个模型 |
1 | @Controller |
- 直接接收restful格式并进行封装
路径请求
<a href="m2/wwj/32">restful操作</a>接收restful
1 | @RequestMapping("/m2/{name}/{age}") |
注意数据:数据被封装到modelattr中,同时也是在model中的
设置请求方式 (了解)
@RequestMapping(value=”m3”,method=RequestMethod.POST)
通过method来设置http的请求方式
总结:其实不在乎注解的与多少,毕竟是属于对servlet的包装,可以假定不管使用什么方式,接收到前台所传递的参数
springMVC对于静态资源的处理
- 使用
<mvc:resources>掌握

静态资源在加载的时候,被拦截了。这个时候需要我们在springmvc中标注哪些为静态资源,不受springmvc进行拦截
<mvc:resources location="/js/" mapping="/js/**"/>
location代表着webcontext容器下路径。映射所有js下面的资源为静态资源
观察浏览器资源加载列表
- 使用
<mvc:default-servlet-handler/>(掌握)
SpringMVC的文件上传和下载
文件上传
- 构建form表单 需要设置enctype(编码格式) 为 multipart/form-data 不仅包含文本数据,还包含文件数据
1 | <!-- 多文件上传 --> |
- 引入对应的jar包
Commons-fileupload.jar和commons-io.jar 2个包属于依赖关系翻译过来就是通用的上传与通用的读写操作
- 设置对应的上传数据要求在springmvc.xml中
1 | <bean id="multipartResolver" class="org.springframework.web.multipart.commons.CommonsMultipartResolver"> |
- 处理对应上传的处理类
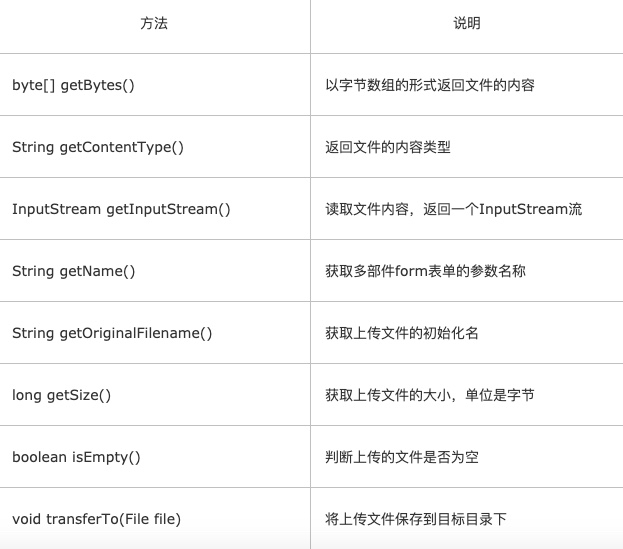
1 | @Controller |
注意:UUID 是 通用唯一识别码(Universally Unique Identifier),是一种软件建构的标准

使用ajax进行文件的上传
注意事项:
- 需要使用到js中一个叫做formData对象
- 尽量使用goole或者火狐浏览器
1 | function testup(){ |
注意:contentType 和 processData 设置为false 使其能够正确的对formdata进行处理
文件的下载
- 构建请求
1 | <a href="downloadone">下载单文件</a> |
- 构建处理类:
- 单文件下载
1 | @Controller |
- 多文件需要考虑进行打包
1 | @RequestMapping("/downloadmore") |
SpringMVC 的统一异常处理(掌握) (避免在controller中进行冗余的try catch操作)
- 先自定义异常
1 | /** |
- 定义全局异常处理类 (需要用到@ControllerAdvice以及@ExceptionHandler(ServiceException.class))
1 | @ControllerAdvice |
- controller业务处理
1 | @Controller |
注意:开发中,我们在设计业务功能模块,都需要配置对应的exception处理
SpringMVC 拦截器 (掌握) 拦截 Interceptor
拦截器是对过滤器操作的一种升华。拦截器本身的机制也是aop进行实现
- 操作方式
1 | public class MyInterceptor implements HandlerInterceptor{ |
- 配置文件
1 | <mvc:interceptors> |
执行的顺序为
preHandle 在业务处理器处理请求之前被调用(如果preHandle返回false)
postHandle 在业务处理器处理请求执行完成后,生成视图之前执行
afterCompletion 完全处理完请求后被调用,可用于清理资源等
SpringMVC 的自动校验(了解)
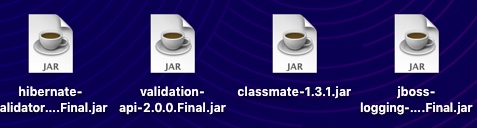
- 引入相关的jar包
- 构建实体类 (有一些注解可以对对象的某个字段进行检验)
1 | import javax.validation.constraints.NotBlank; |
- (将配置文件中拦截器代码剔除)
1 | <form action="user1" method="post"> |
- 控制代码中通过提供的errorObj来获取验证的信息
1 | @Controller |